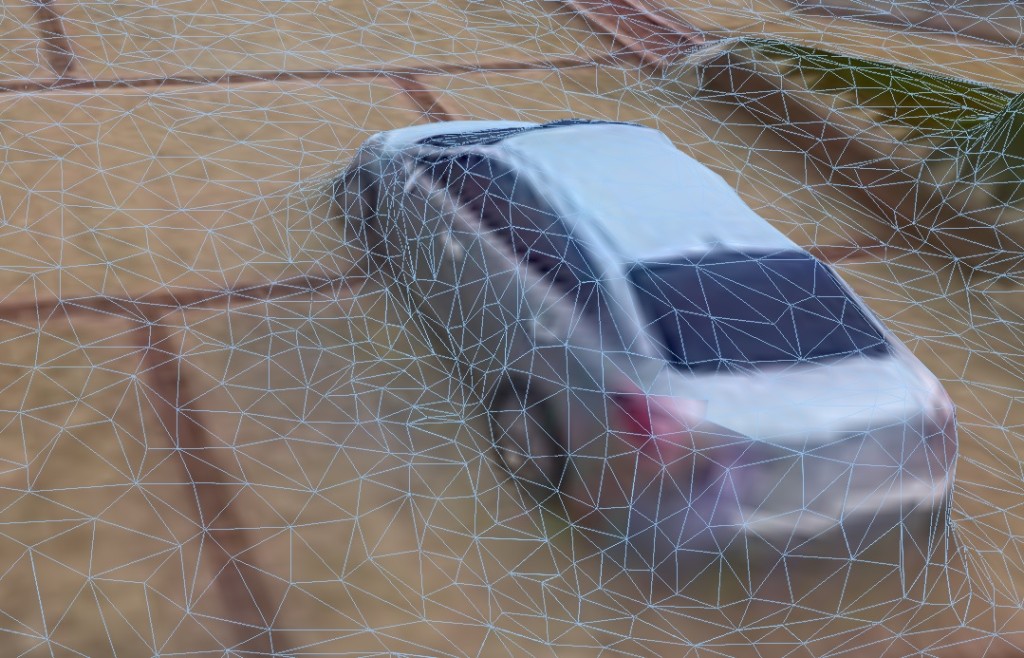
There are new technologies and services that now make mapping with drones very easy. I introduced you to this method in a post over on Drone Coalition HERE. Now we are going deeper into how to actually capture and process the imagery. There are apps for your drone and servers for the processing available online. If you have one of the more modern drones that can properly geotag imagery then you can make maps and 3D models like the one you see above. In this tutorial I a going to show you one way to do these amazing maps and 3D models. It is not that hard but you need to understand what imagery and GPS information is needed. Only a few consumer level drones have the ability to do proper gps tagging of the imagery. The 3 best mapping drones to use right now are the DJI Phantom 3 series, the DJI Inspire1 and soon, the 3DR Solo. There are other drones that will map but we are going to focus on methods that work for these drones currently in October of 2015.
The method I will describe here will be using a DJI Phantom 3 Series drone, Pix4dMapper App for the mobile device you use to control your drone, and Drone Deploy’s Mapping Engine Beta for the processing and exports. This method will work with with the DJI Phantom 3 Series or the DJI Inspire1. The method should work for the 3DR Solo, but I have not been able to test it on that aircraft yet. For the 3DR Solo to do this, use of the 3DR waypoint system is used instead of the Pix4DMapper App.
So where do you start? Well first you want to get all the software and make sure it works with your drones firmware version and the mobile device you use to control your drone. The easiest way to do that right now is with Pix4D Capture App The Pix4D Capture application is available for both Android and IOS but only the Android Beta works with the DJI Phantom 3 Series. Sign up for the beta here https://support.pix4d.com/hc/en-us/community/posts/204542545–Android-Beta-Phantom-3-Professional-Advanced-and-Inspire-1 (You will recieve an immediate upgrade of your Play Store version to the Beta after you install the production version on your device)
OK Now you have Capture and a Phantom 3 Series with latest firmware and it is time to start capturing your dataset of images. I am going to show you the manual way to do all of this, later in this tutorial you will find that capturing the dataset will be much easier with the Drone Deploy system running your drone for you. The current Drone Deploy system requires connectivity to the internet to be used. My situation does not allow this in many cases so I have to capture manually most of the time. I will not explain the use of Pix4D Capture as they have excellent tutorials and support information on their site www.Pix4d.com. I also will explain how to do the capture easier in connected areas later. Load the app, sign up for the Beta from the link above and test the app on your drone, before trying the rest of the tutorial.
Now we get into the basics of actual mapping…..
Here is the process that I use for manual capture:
The object here is to capture a top down highly overlapped set of images covering the entire area you want mapped. These images are called Nadir Imagery, or imagery taken just below the focal element. The mapping system will use the images to create a point cloud that connects the imagery and helps build the 3D model and DSM maps. When you look at an object from many angles you can predict the objects size and shape from the differing angle of the images.
- Open the Pix4D Capture app with the drone connected before leaving home or close to the location where you have good connectivity to connect to the internet.
- Go to the mapping location on the DJI Go App and the Pix4D Capture app map to get the mapping imagery cached for the location if it is not a connected area. ( I do this anyway to speed up my mapping mission)
- I find an altitude that clears all obstacles and is clearly above any aerial wires or trees. (The altitude is set during the mission planing in Pix4D Capture. You can find a safe altitude by flying around a bit if necessary.)
- Open the DJI Go App and set up your camera to manual mode for best results. Find settings that allow for a high shutter speed of 400 or greater and change the white balance to the appropriate setting for the location. You can use auto mode on the camera but you will probably have white balance issue if you do not lock that down.
- I usually first do a Pix4D grid map, with high overlap. Or I use their Free Flight option and set it for 30 feet in either direction.
- Fly the grid over your target. Land, and stop the app.
Next we have top capture Low Level Oblique images to make our 3D model and DSM better. Low Level Obliques are images of the target area taken at a angle like 45 degrees where the horizon is not visible across the image. The object here is to give the program more angles to predict the elevations and to give the 3D model better meshes when seen from a low angle. The program can make a decent model from the Nadir (Straight Down) imagery we captured in the first section. So, these images are not necessary to make a map or a model, it just makes them a lot better. So, give it a try they are easy!
There are two ways to get the Low Level Oblique images for your dataset. The Pix4D app can be used in Free Flight mode or you can use the DJI Go app and just fly around and take the images you need. Either way you will be culling some of these images later if you mess up and get sky in your images.
- Open the Pix4D Capture Beta App and select Free Flight Mode.
- Take off and then press the start button to start capturing images ( settings are best to capture every 30 feet in either direction for most maps)
- Switch the app to camera view mode at this point
- Fly around the area looking down at a 45 degree angle or so and try not to get the horizon in your shots. (your gimbal wheel works in this mode)
- The app will blink every time it take an image … Fly around the buildings and objects to get an image of every side of them but don’t overdo it.
- Stop the app from taking images of you can.. if not, close the app and just land then shut off the drone. ( a problem with the android beta app seems to impede in letting the app stop taking images at this writing)
- You Done with Capturing Data! Head home!
(You can of course do all of this with the DJI Go App and manually fly around getting the Nadir and Low Level Oblique images. The DJI aircraft tags all the images with the necessary information.)
Now you have a dataset….. whats next?
- Next dump your chip and look at your images.
- Remove any images that show the sky (or unwanted shots like landings of the camera did not shut off)
- Put all of your good images in a single directory ready for upload….
Goto https://www.dronedeploy.com/signup and get the Free Beta account. This will give you access to the mapping server. You will also find they have an application that does most of the work listed above for you. If you have the right aircraft and firmware levels, I highly recommend using this application for you capture needs. Here is their page on how to get setup with Drone Deploy Beta http://support.dronedeploy.com/docs/inspire-1–phantom-3-beta. I will be doing a tutorial on its use soon. Currently the Drone Deploy catering application only works where there is connectivity. This method works anywhere anytime…..
After you get your account setup you will need to apply for use of the Beta Mapping Engine (this may take a few days depending on the number of active beta users) That link is here https://docs.google.com/forms/d/1Czvp3Xk84tT-E7mCbUmWCW4kVfama9XpT-GHm-EaJdI/viewform
Once you have the Mapping Engine Beta at your disposal all you have to do is
- Log into www.DroneDeplpoy.com/app/dashboard
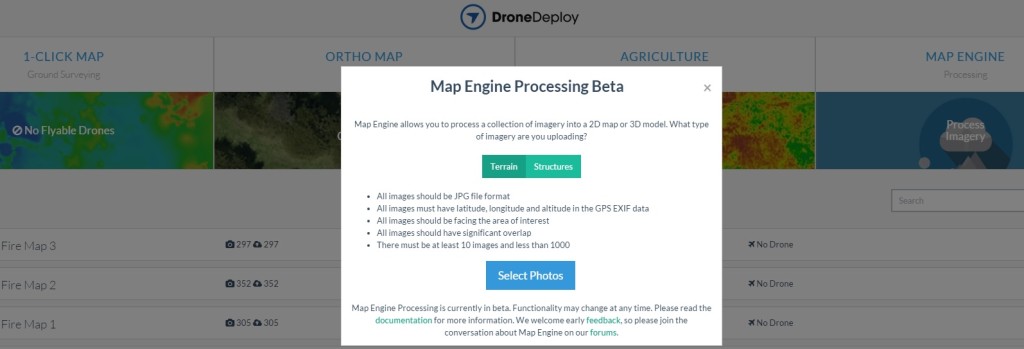
- Select Mapping Engine – Process Imagery
- Click on Structures
- Click on Select Images
- Select your images (More than 10 and less than 400 for the Structure selection)
- Let the site do the uploads and the work from here on… come back in a few hours and see the results!


