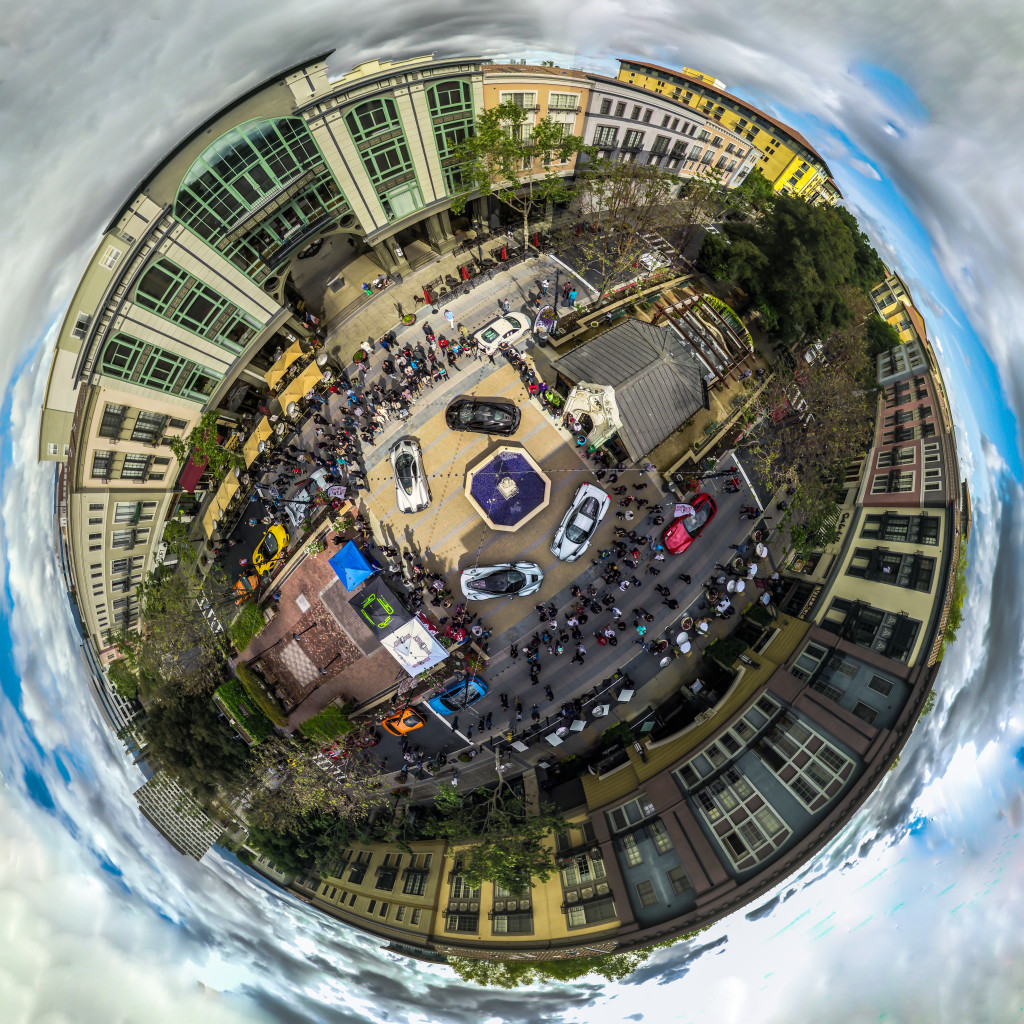
Dawn, Prior to the first day of the Toyota Grand Prix of Long Beach. High altitude Aerial Spherical Panoramic using GoPro 4K Video.

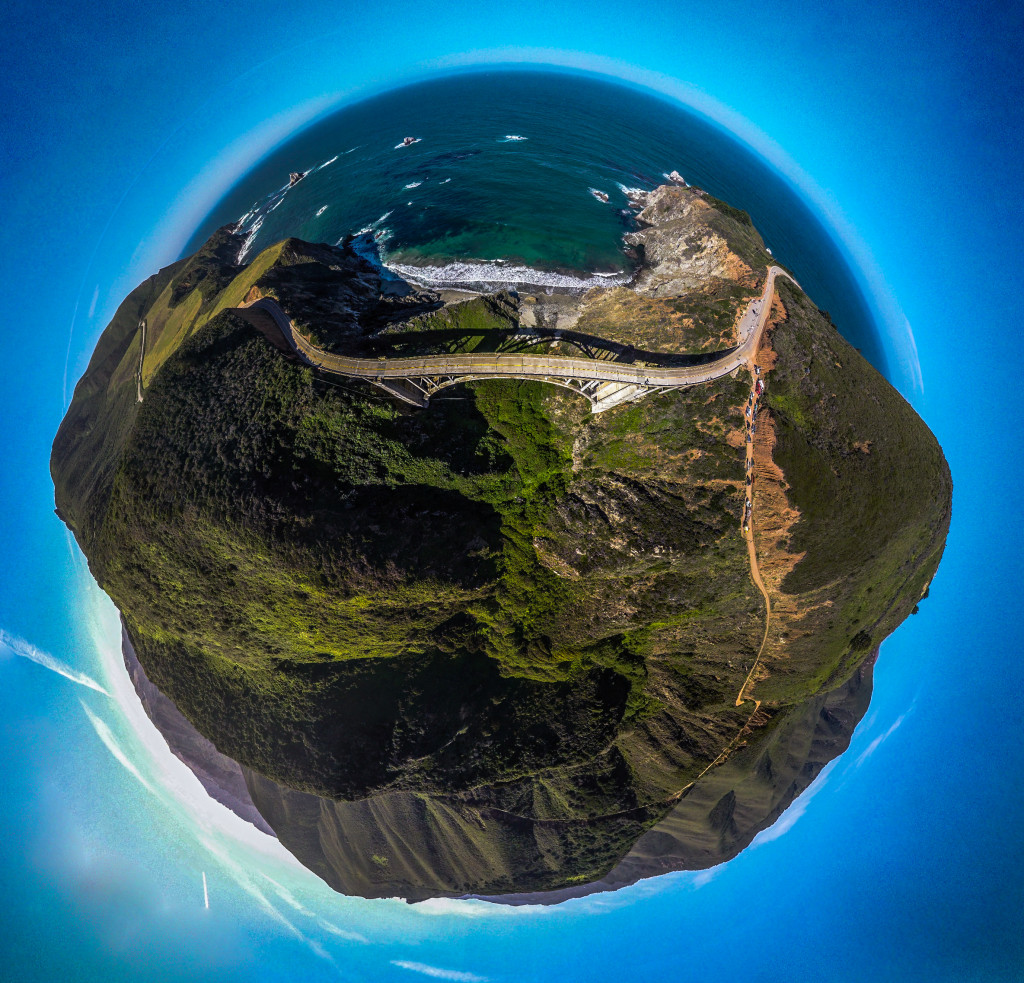
The Sea Otter Classic, North Americas largest bicycling event Turn 5 Bridge Low altitude Aerial Panorama made from GoPro 4K video.
Tiny World Aerial Panoramas from 4K video
If you ever tried to make one of these “Tiny World” perspectives from your aerial platform, you probably figured out, that it is not that easy to get good results. It is hard to even capture the images needed during a single flight with some settings and cameras. Here I will outline a process that I use to make these images using the GoPro 4K video mode that I normally use for filming. The capture time is typically 2 minutes or less for what you see above. The process uses stills exported as TIFF’s in Adobe Premiere, processes them in Lightroom, and then stitches them together in a Tiny World 360 Projection. The stitching is done with Kolor’s AutoPanoGiga which allows you to complete extremely difficult stitches and warp the resulting stitched image in such a way that it looks like you are closer to your subject than you actually are. I know that sounds very confusing and intimidating, but I assure you this is not a hard thing to do. The post process work can be done entirely in Adobe CC, but the imagery must be easy to stitch. The power of post processing programs has made even the most difficult math and geometry possible. If you think stitching still images is tough … wait until you try stitching 360 Video! That will make you insane about “parallax”, which is something we don’t worry about too much in the aerial world.
Lets go over the process step by step and show you how you can make one of these fairly easily. Lets start by looking at our GoPro settings and how to capture the imagery.
My GoPro Hero 4 Black Edition Settings (similar settings on 4K cameras from DJI, Panasonic, and others, will work fine too)
- Video mode 4K (24 or 30 frames per second will work fine, use whatever you usually use to shoot video) you only have a choice of Wide angle so we will deal with that later on in Adobe Lightroom
- Use Protune and GoPro color options.
- Set auto ISO max 400 (this can change with lighting, but it is best if you do the capture in proper lighting, to use 400 ISO or less)
- Exposure compensation -0.5 unless you are using a filter
- Time of day for the shoot will affect getting shadows from the props in the image when turned in certain angles. Since you must turn 360 degrees several times at different angles of tilt, it is recommended that you use a sun shield/visor or fly when the sun is below the props.
(If you are using a DJI camera, setup similar settings in the app and you don’t have to worry about Protune or GoPro color options.)
How I capture the imagery
- Focus your camera on the subject that you want to be the focal point, subject, or center of your panoramic
- Tilt the gimbal so that the props are just barely visible in the image or just barely out of frame. Lens correction will clean this up later.
- Rotate the camera one and one half turns or 360 degrees – You just captured the first rotation!
- Tilt the camera down for a 30% overlap of the previous alignment
- Rotate 360 degrees – You just captured the second rotation! (This may be all you need before tilting straight down depends on altitude)
- Tilt the camera down for a 50% overlap of the previous alignment
- Rotate 360 degrees – You just captured the third rotation!
- Tilt the camera straight down
- rotate 360 degrees and you are done….
- Fly around and capture some video now that you still have time on your battery, or do another pano!
Post Production Workflow (much easier to understand if you watch the video at the bottom)
- Open the video up in Adobe Premiere trimming it to the rotations for this pano and insert it into a sequence.

- You could now process the video for color and lens correction, but I prefer to use Lightroom later for that.
- Export frames from the video. I use the snapshot export icon that looks like a camera to export TIFF’s You export the same frames from this video as you would have shot stills.

- Export a TIFF with about 30% overlap from the previous export each time as you go around the whole 2-3 rotations. Just like you would do if shooting a pano.
- Make sure you pick a good orientation for the straight down image that you want to be in the final picture as your last image export.

- Import into Adobe Lightroom….
- Process the images for lens correction and perhaps a few light changes to WB or other sliders. (Do not over process here)

- IF YOU WANT TO TRY THE ADOBE CC METHOD SKIP TO THE NEXT WRITTEN SECTION AT THIS POINT.
- Export images to a working directory as TIFF or JPG…. there are between 12 and 25 images usually. (I have not seen much a of a difference from this point on using either Tiff or JPG format with my GoPro video stills. Results may vary camera to camera)
- Open Kolor’s AutoPanoGiga
- Select those images with Kolor’s AutoPanoGiga and press detect

- After the pano is found and arranged click on the edit button

- then select the Projections options
![[Group 0]-Pano.00_00_18_11.Still021_Pano.00_00_56_03.Still030-11 images.pano 4242015 114736 AM.bmp](http://whirlingtripod.com/wp-content/uploads/2015/04/Group-0-Pano.00_00_18_11.Still021_Pano.00_00_56_03.Still030-11-images.pano-4242015-114736-AM.bmp.jpg)
- select “Little Planet”
![[Group 0]-Pano.00_00_18_11.Still021_Pano.00_00_56_03.Still030-11 images.pano 4242015 114955 AM.bmp](http://whirlingtripod.com/wp-content/uploads/2015/04/Group-0-Pano.00_00_18_11.Still021_Pano.00_00_56_03.Still030-11-images.pano-4242015-114955-AM.bmp.jpg)
- Render out the final image with anti ghosting and send it to the same directory that you used in Lightroom
- Import the rendered image into lightroom
- Do final processing heal and clone in the corners and crop the image
- Export and Share!
The all Adobe CC method of doing Post Processing
Post Production Workflow using Premiere CC, Lightroom CC, and Photoshop CC
- Open the video up in Adobe Premiere trimming it to the rotations for this pano and insert it into a sequence.


- You could now process the video for color and lens correction, but I prefer to use Lightroom later for that.
- Export frames from the video. I use the snapshot export icon that looks like a camera to export TIFF’s You export the same frames from this video as you would have shot stills.

- Export a TIFF with about 30% overlap from the previous export each time as you go around the whole 2-3 rotations. Just like you would do if shooting a pano.
- Make sure you pick a good orientation for the straight down image that you want to be in the final picture as your last image export.

- Import into Adobe Lightroom….
- Process the images for lens correction and perhaps a few light changes to WB or other sliders. (Do not over process here)
- Select all of the images (there should be 11-16 of them for a simple and easy stitch)
- Right Click and select Photomerge > Panorama (Adobe will automatically try to merge the images… if this does not work then either your images are not just right or you have too many images or the stitch is just too difficult for this method… use AutoPanoGiga method above and in the video)
- If this works you will end up with an upside down pano which needs to be turned into a Polar Coordinates warp
- Right click the resulting image and select Edit In > Open as Smart Object in Photoshop CC
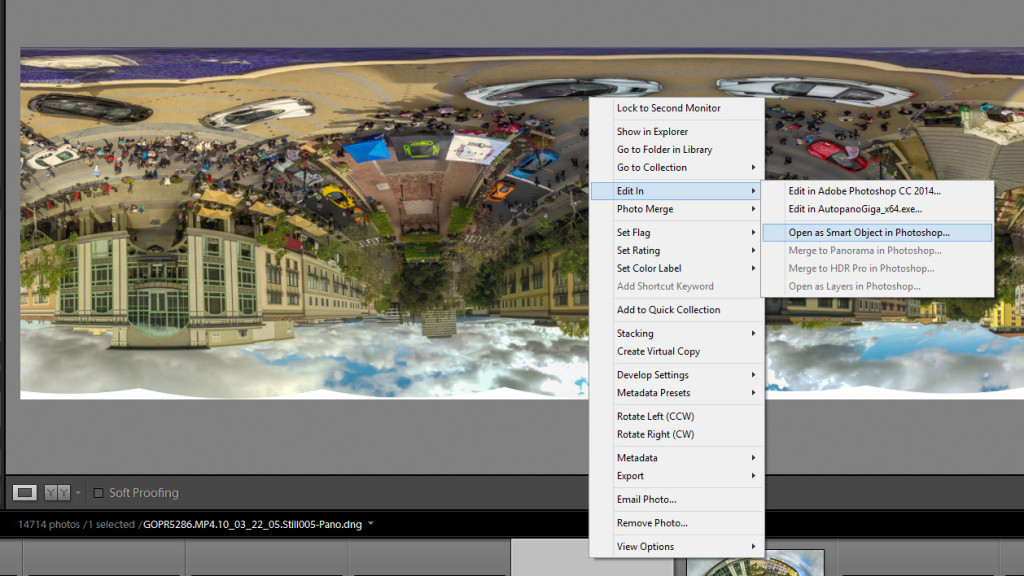
- Once the image is in PS select Image > Image Size
- When you get to this Dialog Box select Pixels and set your image’s height to match its width in pixels
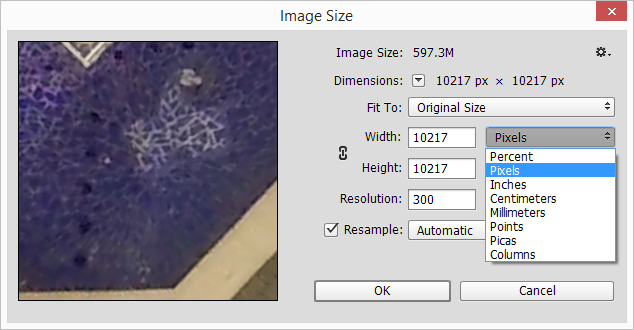
- Now that the image is ready (Upside down and square) select Filter > Distort > Polar Coordinates…

- Saving in Photoshop will also import it into Lightroom if you still have it open
- Do final processing heal and clone in the corners and crop the image
- Export and Share!
Video Tutorial of the AutoPanoGiga process
